Category Archives: cameras

Scene Files (Picture Profiles) for the PXW-FS7

See also my latest LUT’s for BOTH the PXW-FS7 and PXW-FS7M2.

One of the great features of the PXW-FS7 is the ability to be able to change the look of the images when shooting in Custom Mode. You can change many settings including the gamma curve, matrix and sharpness setting. The gamma settings change the contrast, the matrix the color and the detail and aperture settings change how sharp the pictures look.

Once you’ve made some changes you can save these settings as a Scene File using the File menu on an SD card.

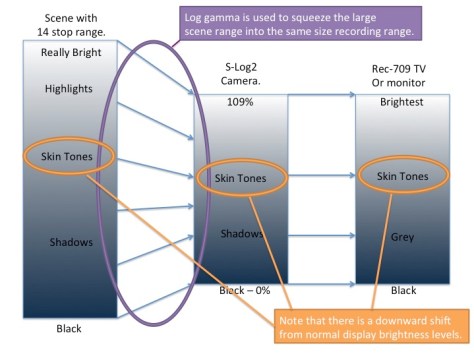
I am a big fan of Sony’s Hypergammas. There are 6 in the FS7. Hypergamma 3 is very good for getting a nicer highlight roll off when shooting in lower light situations. Hypergamma 4 is good for brighter scenes and Hypergammas 7 and 8 really extends the cameras dynamic range and handles high contrast scenes very well, but can look a little flat so will need some tweaking in post production.  In fact all the hypergammas need a bit of a tweak in post as to get the very best from them you should expose your shots about 1 stop darker to keep skin tones etc out of the upper compressed part of the curve and then bring the brightness back up again in post.

Anyway here are some scene files for you to download and install in the camera.

AC-NEUTRAL-HG3 This is for flatter scenes, it provides a natural look with some yellow/green removed to provide a more neutral look.

AC-NEUTRAL-HG4 This is for brighter or high contrast scenes, it provides a natural look with some yellow/green removed to provide a more neutral look.

AC-FILMLIKE1 A high dynamic range film like look.

AC-FILMLIKE2 A high dynamic range film like look with an increased blue and red response with decreased yellow/green. A little more block-buster like.

AC-VIBRANT-HG3 A vivid matrix with good dynamic range. Good for punchy direct to air images where strong colours are wanted.

AC FS7 Scene Files, set of 5.
If you find these scene files useful, please consider buying me a beer or a coffee. All donations are really appreciated and allow me to spend more time on the blog creating new guides and scene files etc.


Type


To install the files in the camera, download and unzip the zip file. Then copy the 5 001.SCENE, 002.SCENE files to the following directory on an SD card:

PRIVATE/SONY/PRO/CAMERA/PXW-FS7/

Insert the SD card in to the camera. Go to the “File” menu and “Scene File” and choose “Load from SD Card”.

If you already have some scene files on your SD card then you can re-number the Scene Files with numbers higher than the files already on your SD card before copying the new files to the SD card. Hope that makes sense??

Ultimate Guide for Cine EI on the Sony PXW-FS7

Ultimate Guide to CineEI on the PXW-FS7 (Updated May 2016).

INTRODUCTION:

This guide to Cine-EI is based on my own experience with the Sony PXW-FS7. There are other methods of using LUT’s and CineEI. The method I describe below, to the best of my knowledge, follows standard industry practice for working with a camera that uses EI gain and LUT’s.

If you find the guide useful, please consider buying me a beer or a coffee. It took quite a while to prepare this guide and writing can be thirsty work.


Type


Through this guide I hope to help you get the very best from the Cine EI mode on the PXW-FS7.

The camera has two very distinct shooting mode, Cine EI and Custom Mode. In custom mode the camera behaves much like any other traditional video camera where what you see in the viewfinder is what’s recorded on the cards. In custom mode you can change many of the cameras settings such as gamma, matrix, sharpness etc to create the look you are after in-camera. “Baking-in” the look of your image in camera is great for content that will go direct to air or for fast turn around productions. But a baked-in look can be difficult to alter in post production. In addition it is very hard to squeeze every last drop of the picture information that the sensor can capture in to the recordings in this mode.

The other mode, Cine-EI, is primarily designed to allow you to record as much information about the scene as possible. The footage from the camera becoming, in effect a “digital negative” that can then be developed in post production and the final, highly polished look of the film or video created in post. In addition the Cine-EI mode mimics the way a film camera works giving the cinematographer the ability to rate the camera at different ISO’s to those specified by Sony. This can be used to alter the relative noise levels in the footage or to help deal with difficult lighting situations.

One further “non-standard” way to use Cine-EI is to use a LUT (Look Up Table) to create an in-camera look that can be baked in to the footage while you shoot. This offers an alternative to custom mode. Some users will find it easier to create a specific look for the camera using a LUT than they would by adjusting camera settings such as gamma and matrix.

MLUT’s and LOOK’s (both are types of Look Up Tables) are only available in the Cine-EI mode.


THE SIMPLIFIED VERSION:

Before I go through all the “why’” and “hows” first of all let me just say that actually, CineEI is easy. I’ve gone in to a lot of extra detail here so that you can fully master the mode and the concepts behind it.

But in it’s simplest form, all you need to do is to turn on the MLUT’s. Choose the MLUT that you like the look of, or is closest to the final look you are after. Expose so that the picture in the viewfinder or on your monitor looks how you want and away you go.

Then in post production bring in your S-log footage. Apply the same LUT as you used when you shot and the footage will look as shot. Or just grade the footage as desired without a LUT, it is not essential to use a LUT in post production.  As the footage you have shot is either raw or Slog you have a huge range of adjustment available to you in post.

THAT’S IT! If you want, it’s that simple (well almost).

If you want to get fancy you can create your own LUT and that’s really easy too (see the end of the document). If you want less noise in your pictures use a lower EI. I shoot using 800EI on my FS7 almost all the time.

Got an issue with a very bright scene and strong highlights, shoot with a high EI (this should only ever be a last resort, try to avoid using an EI higher than 2000EI).

Again, it’s really simple.

But anyway, lets learn more about it and why it works the way it works.

LATITUDE AND SENSITIVITY.

The latitude and sensitivity of the PXW-FS7, like most cameras is primarily governed by the latitude and sensitivity of the sensor. The latitude of the sensor in the FS7 is around 14 stops. Adding different amounts of conventional camera gain or using  different ISO’s does not alter the sensors actual sensitivity to light, only how much the signal from the sensor is amplified. This is like turning up or down the volume on a radio, the sound level gets higher or lower, but the strength of the radio signal is just the same. Turn it up loud and not only does the music get louder but also any hiss or noise, the ratio of signal to noise does not change, so BOTH the noise and the music get louder. Turn it up too loud and it will distort. If you don’t turn it up loud enough, you can’t hear it, but the radio signal itself does not change. It’s the same with a video cameras sensor. It always has the same sensitivity, With a conventional camera, or when the FS7 is in Custom Mode we can add or take away gain (volume control?) to make the pictures brighter or darker (louder?) but the noise levels will go up and down too.

NATIVE ISO:

Sony’s native ISO rating for the FS7 of 2000 ISO has been chosen by Sony to give a good trade off between sensitivity, noise and over/under exposure latitude. In general the native ISO will give excellent results. But there may be situations where you want or need different performance. For example you might prefer to trade off a little bit of over exposure headroom for a better signal to noise ratio, giving a cleaner, lower noise picture. Or you might need a very large amount of over exposure headroom to deal with a scene with lots of bright highlights.

The Cine EI mode allows you to change the effective ISO rating of the camera, without altering the dynamic range.

With film stocks the film manufacturer will determine the sensitivity of the film and give it an Exposure Index which is normally the equivalent of the films measured ASA/ISO.  It is possible for a skilled cinematographer to rate the film stock with a higher or lower ISO than the manufacturers rating to vary the look or compensate for filters and other factors. You then adjust the film developing and processing to give a correctly exposed looking image. This is a common tool used by cinematographers to modify the look of the film, but the film stock itself does not actually change it’s base sensitivity, it’s still the same film stock with the same base ASA/ISO.

Sony’s Cine EI mode and the EI modes on Red and Arri cameras are very similar. While it has many similarities to adding conventional video camera gain, the outcome and effect can be quite different. If you have not used it before it can be a little confusing, but once you understand the way it works it is very useful and a great way to shoot. Again, a key thing to remember that the actual sensitivity of the sensor itself never changes.


CONVENTIONAL VIDEO CAMERA GAIN.

Increasing conventional camera gain will reduce the cameras dynamic range as something that is recorded at maximum brightness (109%) at the native ISO or 0db would be pushed up above the peak recording level and we can’t record a signal larger than 109%. But as the true sensitivity of the sensor does not change, the darkest object the camera can actually detect remains the same. Dark objects may appear a bit brighter, but there is still a limit to how dark an object the camera can actually see and this is governed by the sensors noise floor and signal to noise ratio (how much noise there is in the image coming from the sensor).

Any very dark picture information will be hidden in the sensors noise. Adding gain will bring up both the noise and darkest picture information, so anything hidden in the noise at the native ISO (or 0db) will still be hidden in the noise at a higher gain or ISO as both the noise and small signal are amplified by the same amount. So adding gain does not extend the the ability to see further into the shadows, but does decrease the ability to record bright highlights. The net result of adding gain is a decrease in dynamic range.

Using negative gain or going lower than the native ISO may also reduce the dynamic range as picture information very close to black will be shifted down below black when you subtract gain or lower the ISO. At the same time there is a limit to how much light the sensor can deal with before the sensor itself overloads. So even though reducing the ISO or gain may make the picture darker, the sensors clipping/overload point remains the same, so there is no change to the upper dynamic range, just a reduction in recording level. The net result is you loose shadow information, don’t gain any highlight information, this again means a reduction in dynamic range.

See also this article on gain and dynamic range.

As Sony’s Slog2 and Slog3 are tailored to capture the cameras full 14 stop range this means that when shooting with Slog2 or Slog3 the gamma curve will ONLY work as designed and deliver the maximum dynamic range when the camera is at it’s native ISO. At any other recording ISO or gain level the dynamic range will be reduced. IE: If you were to use SLog2 or SLog3 with the camera in custom mode and not use the native ISO by adding gain or changing the ISO away from 2000, you will not get the full 14 stop range that the camera is capable of delivering.

EXPOSURE LEVELS FOR DIFFERENT GAMMA CURVES AND CONTRAST RANGES.

It’s important to understand that different gamma curves with different contrast ranges will require different exposure levels. The TV system that we use today is currently based around a standard known as Rec-709. This standard specifies the contrast range that a TV set or monitor can show and which recording levels represent which display brightness levels. Most traditional TV cameras are also based on this standard. Rec-709 does have some serious restrictions, the brightness and contrast range is very limited as these standards are based around TV standards and technologies developed 50 years ago. To get around this issue most TV cameras use methods such as a “knee” to compress together some of the brighter part of the scene in to a very small recording range.

A traditional TV camera with a limited dynamic range compresses only a small highlight range.

A traditional TV camera with a limited dynamic range compresses only a small highlight range.

As you can see in the illustration above only a very small part of the recording “bucket” is used to hold a moderately large compressed highlight range. In addition a typical TV camera can’t capture all of the range in many scenes anyway. The most important parts of the scene, from black to white (such as a white piece of paper), is captured more or less “as is”. This leaves just a tiny bit of space above white to squeeze in a few highly compressed highlights. The black to white range represents about 5 stops, these are the most important stops as the majority of things that are important fall in this range. Faces, skin tones, plants, buildings etc all fall within the black to white range. Anything brighter than white must be a direct light source such as the sky, a reflection or lamp.

The signal from the TV camera is then passed directly to the TV and as the shadows, mid range and skin tones etc are all at more or less the same level as captured the bulk of scene looks OK on the TV/Monitor. Any highlights or other brighter than white such as direct light sources may look a little “electronic” due to the very large amount of compression used.

But what happens if we want to record more of the scenes range or compress the highlights less? As the size of the recording “bucket”, the codec etc, does not change, in order to capture a greater range and fit it in to the same space, we have to re-distribute how we record things.

Recording a greater dynamic range into the same sized bucket.

Recording a greater dynamic range into the same sized bucket.

Above you can see instead of just compressing a small part of the highlights we are now capturing the full dynamic range of the scene. To do this we have altered the levels that everything is recorded at. Blacks and shadows are recorded lower, greys and mids are lower and white is a lot lower. By bringing all these levels down, we make room in our recording bucket for the highlights and the really bright stuff without them being excessively compressed.

The problem with this though is that when you output the picture to a monitor or TV it looks odd. It will lack contrast as the really bright stuff is displayed at the same brightness as the conventional 709 highlights. White is now darker then faces would be with a conventional TV camera.

This is how the Hypergammas work:

This is how the Hypergamma works. By re-distributing the recording levels we can squeeze a much bigger dynamic range into the same size recording bucket. But it won’t look right when viewed directly on a standard TV or monitor. It may a little look dark and perhaps a bit washed out. This is because the cameras gamma curve now no longer matches the monitors gamma curve.

I hope you can also see from this that whenever the cameras gamma curve does not match that of the TV/Monitor, the picture might not look quite right. Even when correctly exposed, white may be at different levels, depending on the gamma being used, especially if the gamma curve has a greater range than the normal Rec-709 used in old school TV cameras.

S-Log uses recording levels very different to conventional gammas.

S-Log takes this a step further and instead of using a highlight roll off, knee or other form of highlight compression, S-Log takes every stop that is brighter than middle grey and records each with the same amount of data. This is “log” encoding and is very different to the way a conventional gamma curve works. To fit a big dynamic range into our restricted range recording bucket each of the recorded stops is kept relatively small. Because the way the recording is made and the way the data is distributed is very different to the levels that a normal Rec-709 TV expects, when viewed on a Rec-709 TV, S-log doesn’t look great. It looks flat and lacks contrast. However it is worth understanding that if the TV actually had S-Log as it’s gamma curve the picture would look no different to a picture recorded with normal rec-709, it would not be flat, it would have lots of contrast. The only difference is that it would have a bigger dynamic range, so if the TV could do it, the highlights would be brighter.

THE CORRECT EXPOSURE LEVELS FOR SLOG-2 and SLOG-3.

Before we go any further lets just look at the correct exposure levels for SLog-2 and SLog-3 as recommended by Sony. As these gamma curves have a very large dynamic range the recording levels that they use are very different to the levels used by the normal 709 gamma curve used for conventional TV. As a result when correctly exposed, Slog looks flat and low contrast on a conventional monitor or in the viewfinder. The table below has the correct levels for middle grey (grey card) and 90% reflectance white (a white card or white piece of paper) for the different types of Slog.

Correct exposure levels for Sony's Slog.
Correct exposure levels for Sony’s Slog.

Correct exposure levels for Sony’s Slog.

The white level in particular is a lot lower than we would normally use for TV gamma. This is done to give extra space above white in the recording bucket to fit in the extended range that the camera is capable of capturing, all those bright highlights, bright sky and clouds and other things that cameras with a smaller dynamic range struggle to capture.

SETTING THE CORRECT EXPOSURE.

Let’s now take a look at how to set the correct starting point exposure for SLog-3. You can use a light meter if you wish, but if you do want to use a light meter I would first suggest you check the calibration of the light meter by using the grey card method below and comparing what the light meter tells you with the results you get with a grey or white card.

The most accurate method is to use a good quality grey card and a waveform display. For the screen shots seen here I used a Lastolite EzyBalance Calibration Card. This is a pop up grey card/white card that fits in a pocket but expands to about 30cm/1ft across giving a decent sized target. It has middle grey on one side and 90% reflectance white on the other. With the MLUT’s off, set the exposure so that the grey card is exposed at the appropriate level (see table above). If the firmware in your camera is up to date (at least version 3.0) you can set the zebras to 32% or 41% to do this or use an external monitor with a waveform display. The FS7’s built in waveform display is very had to use as it is so small and has no scale. I also recommend the use of a DSC Labs “One Shot” chart. The front of the chart has a series of color references that can be used in post production to set up your base color correction while the rear of the chart has both a large middle grey and 90% white square.

USING THE FS7’s WAVEFORM MONITOR OR ZEBRAS TO SET THE CORRECT BASE S-LOG3 EXPOSURE.

IMPORTANT NOTE: If you use a LUT, The Zebras measure the viewfinder image, so if a LUT is on for the the viewfinder, then the zebras measure the LUT. If there is no viewfinder LUT then the zebras measure the S-Log.

The Waveform Monitor and Histogram measure the SDI2 levels. So if you have a LUT on for SDI2 then the LUT levels are measured. If there is no LUT on SDI2 then the S-Log levels are measured.

See this video for more information on the Waveform, Histogram and Zebras:

The internal waveform display settings are found in the menu under:

VF: Display On/Off: Video Signal Monitor.

Setting the correct exposure for Slog-3 using a grey card. Middle grey should be 41%

Setting the correct exposure for Slog-3 using a grey card. Middle Grey should be 41%

If you don’t have access to a better waveform display you can use a white card or grey card and zebras. When using zebras I prefer to use white as the reference as it is easier to see the zebras on a white target than a grey one. By setting up the Zebras with a narrow aperture window of around 3% you can get a very accurate exposure assessment for white. For SLog-3 set the Zebras to 3% aperture and the level at 61%.  For Slog-2 set the zebra level to 59%. To be honest, if you were to set the zebras to 60% this is going to work for both S-Log2 and S-Log3, a 1% error is too small to make any difference and variations in lighting or the white target will be greater than 1% anyway.

Setting up the Zebras to measure S-Log3 exposure of white card (90% reflectance white card).

Setting up the Zebras to measure S-Log3 exposure of white card (90% reflectance white card).

Correct exposure for S-Log3 when using a 90% reflectance white target.

Correct exposure for S-Log3 when using a 90% reflectance white target.

The image above shows the use of both the Zebras and Waveform to establish the correct exposure level for S-Log3 when using a 90% reflectance white card or similar target. Please note that very often a piece of white paper or a white card etc will be a little bit brighter than a calibrated 90% white card. If using typical bleached white printer paper I suggest you add around 4% to the white values in the above chart to prevent under exposure.

This will get you to the base exposure recommended by Sony, without using a LUT. But very often we want to expose brighter than this to improve the signal to noise ratio.

See also the video below for information on how to setup and use S-Log2 and S-Log3 in the CineEI mode:


USING LUTS’s and CINE EI:

SO HOW DOES CINE-EI WORK?

Selecting Cine EI in base settings on the PXW-FS7

Cine EI is selected in the Base Settings page. It works in YPbPr, RGB and Raw main operation modes.

Cine-EI (Exposure Index) works differently to conventional camera gain. It’s operation is similar in other cameras that use Cine-EI or EI gain such as the F5, F55, F3, F65, Red or Alexa. You enable Cine-EI mode in the camera menus Base Settings page. On the F5 and F55 it works in YPbPr, RGB and RAW modes.

IMPORTANT: In the Cine-EI mode the ISO of the recordings remains fixed at the cameras native ISO (unless baking in a LUT,  more on that later). By always recording at the cameras native ISO you will always have 14 stops of dynamic range.

YOU NEED TO USE A LUT FOR CINE EI TO WORK:

You can only use LUT’s in the CineEI mode. In addition in order to be able to have LUT’s on for the Viewfinder, HDMI / SDI2, but NOT on the SD1 & Internal Rec you cannot set the HDMI to output 4K, you can only use HD or 2K.

PXW-FS7 output options.

So for most applications you will want to set your SDI and HDMI outputs to HD/2K in order to ba able to use the LUT system as designed for CineEI. For reference (2-3PD) means 2-3 pull down is added for 24p footage, so the output will be 60i with 24p footage sgown using pull down. PsF means progressive segmented frame which is the normal HDSDI standard for progressive output. Any of the HD or 2K output modes will allow the use of LUT’

Important: For Cine-EI mode to work as expected you MUST monitor your pictures in the viewfinder or via the SDI/HDMI output through one of the cameras built in MLUT’s (Look Up Table), LOOK’s or User3D LUT’s. So make sure you have the MLUT’s turned on. If you don’t have a LUT then it won’t work as expected because the EI gain is applied to the cameras LUT’s.

At this stage just set the MLUT’s to on for the Sub&HDMI output and the Viewfinder out.

PXW-FS7 Lut selection settings.

The LUT’s are then turned on in the VIDEO: Monitor LUT: settings page of the menu. You will normally want to turn ON LUT’s for SDI2, HDMI and the VIEWFINDER (not seen in the image above, simply scroll down to the bottom of the page to see the VIEWFINDER option). For normal CinEI use you should leave SD1 & Internal Rec OFF as we don’t want to record the LUT, just monitor via the LUT.

EXPOSING VIA THE LUT/LOOK.

When viewing or monitoring via a LUT you should adjust your exposure so that the picture in the viewfinder looks correctly exposed. If the LUT is correctly exposed then The S-Log recording will also be correctly exposed. As a point of reference, middle grey for Rec-709 and the 709(800) LUT should be at, or close to 44% and white will be 90%. Skin tones and faces will be at the normal TV level of around 65-70%. As these levels are waht we are used to seeing with a conventional video camera, this makes judging exposure easy.

This is really quite simple, generally speaking when using a Rec709  LUT, if it looks right in the viewfinder, it probably is right. However it is important to note that different LUT’s will have slightly different optimum exposure levels. For example the 709(800) LUT is designed to be a very close match to the 709 gamma curve used in the majority of monitors, so this particular LUT is really simple to use because if the picture looks normal on the monitor then your exposure will also be normal. The included 709(800) LUT is the most accurate LUT for exposure as this matches the gamma used in the majority of monitors. This LUT produces a nice contrasty image that is easy to focus. It is not meant to be pretty! It is a tool to help you get accurate exposure simply and easily.

Correct exposure of Middle Grey for the 709(800) MLUT. Middle Grey should be 44%. 90% white (a white piece of paper) will be 90% and skin tones will be around 65-70%.

Correct exposure of the 709(800) LUT using a 90% white card, white will be 90%. You can use zebras at 90% to check this level (remember zebras etc measure the LUT exposure level when LUT’s are turned on).

Correct exposure of Middle Grey for the 709(800) MLUT. Middle Grey should be 42%. 90% will be 90%.
Correct exposure of the 709(800) LUT using a 90% white card, white will be 90%. You can use zebras at 90% to check this level.

The above images show the correct exposure levels for the 709(800) LUT. Middle grey should be 44% and 90% white is… well 90%. Very simple and you can easily use zebras to check the white level by setting them to 90%. As middle grey is where it normally is on a TV or monitor and white is also where you would expect to see it, when using the 709(800) LUT, if the picture looks right in the viewfinder then it generally is right. This means that the 709(800) LUT is particularly well suited to being used to set exposure as a correctly exposed scene will look “normal” on a 709 TV or monitor. SIMPLE!

I don’t recommend the use of any of the other LUT’s to set exposure because all of the other LUT’s have brightness ranges that are different to Rec-709. As a result the LUT has to be exposed at non standard levels to ensure the S-Log is exposed correctly. You can use any of the other LUT’s or LOOK if you really wish, but you will need to figure out the correct exposure levels for each LUT.

The LC709-TypeA Look is very popular as a LUT for the FS7 as it closely mimics the images you get from an Arri Alexa (“type A” = type Arri).

The “LC” part of the Look’s name means Low Contrast and this also means – big dynamic range. Whenever you take a big dynamic range (lots of shades) and show it on a display with a limited dynamic range (limited shades) all the shades in the image get squeezed together to fit into the monitors limited range and as a result the contrast gets reduced. This also means that middle grey and white are also squeezed closer together. With conventional 709 middle grey would be 42% and white around 80-90%, but with a high dynamic range/low Contrast gamma curve white gets squeezed closer to grey to make room for the extra dynamic range. This means that middle grey will remain close to 42% but white reduces to around 72%. So for the LC709 Looks in the FS7 optimum exposure is to have middle grey at 42% and white at 72%. Don’t worry too much if you don’t hit those exact numbers, a little bit either way does little harm.

Correct white level for the LC709 LOOK’s. White should be around 72%

Correct white level for the LC709 LOOK's. White should be around 72%
Correct white level for the LC709 LOOK’s. White should be around 72%

Top Tip: Not sure how many people are aware of this function and how it works, but it’s a great way to get around the inability to easily turn the LUT’s on and off in the CineEI mode.

Assign the Hi/Low Key option to one of your assignable buttons. So when using the 709(800) LUT (or any other LUT for that matter) the first press of the button darkens the VF image so you can see what highlights beyond the range of the LUT are doing exposure wise. This allows you to check for clipping that may be present in the much wider range S-log recordings. Press it again and you will see the image brighten allowing you to see further into the shadows so you can see the darkest things being captured by the S-log recordings. The Hi/Low Key function is a great way of seeing your full available exposure range without needing to turn the LUT on and off.

LUT EXPOSURE LEVELS FOR THE OTHER LUTS.

Here are some white levels for some of the built in LUT’s. The G40 or G33 part of the HG LUT’s is the recommended value for middle grey. Use these levels for the zebras if you want to check the correct exposure of a 90% reflectance white card. I have also include an approximate zebra value for a piece of typical white printer paper.

709(800) = Middle Grey 42%. 90% Reflectance white 90%, white paper 92%.

HG8009(G40) = Middle Grey 40%. 90% Reflectance white 83%, white paper 86%.

HG8009(G33) = Middle Grey 33%. 90% Reflectance white 75%, white paper 80%.

The “LC709” LOOK’s = Middle Grey 42%. 90% Reflectance white 72%, white paper 77%.

DONT PANIC if you don’t get these precise levels! I’m giving them to you here so you have a good starting point. A little bit either way will not hurt. Again, generally speaking if it looks right in the viewfinder or on your monitor screen, it is probably close enough not to worry about it.

BUT, again I would suggest sticking to the 709(800) LUT for setting exposure. It’s not the prettiest LUT, but is the only one of the included LUT’s that gives the correct, normal, brightness and contrast range on a conventional monitor, viewfinder or TV. If you want to keep things simple and accurate use 709(800).

USING EI OR EXPOSURE INDEX.

What is EI? EI stands for Exposure Index. This is NOT the same thing as ISO.

ISO is the sensitivity of the camera. ISO is the sensitivity that the camera records at.

EI is the sensitivity of the LUT. EI is the brightness at which the LUT displays the scene.

The FS7 has a native ISO of 2000 and the camera always records at 2000 ISO in the Cine EI mode.

But the EI of the LUT can be varied to make the LUT brighter and darker. the only thing EI changes is the brightness of the LUT. But when exposing via the LUT, if the LUT is made darker, to compensate for the dark looking LUT you open the aperture to let in more light. This will make the LUT look correct again. It will also result in a recording that is brighter than normal as we have opened the aperture.

CHANGING THE EI.

Latitude Indication.

At the native 2000 EI you have 6 stops of over exposure latitude and 8 stops of under exposure latitude (6 stops above middle grey and 8 stops below middle grey). This is how much headroom your shot has. Your over exposure latitude is indicated whenever you change the EI level. In the image below you can see the EI 2000EI followed by a 6.0E the 6.0E is the over exposure latitude.

The EI and Lattitude indication on the FS7.

The EI gain is altered by changing the cameras gain switch and the EI levels assigned to each of the Hi/Mid/Low switch positions can be changed in the camera menu. I recommend setting the EI steps to H 2000, M 1000 and L 500 as this allows you to select the native EI plus 1 stop and 2 stops down (each time you halve the ISO you are shifting the exposure one stop down).

The PXW-FS7 EI settings for the gain switch.

REDUCING THE EI.

So what happens when you halve the EI gain to 1000EI?  1 stop of gain/ISO will subtracted from the LUT. As a result the picture you see via the LUT becomes one stop darker (a good thing to know is that 1 stop of exposure is the same as 6db of gain or a doubling or halving of the ISO). So the picture in the viewfinder gets darker. But also remember that the camera will still be recording at the native ISO (unless baking-in the LUT).


Why does this happen and what’s happening to my pictures?

First of all lets take a look at the scene, as seen in the cameras viewfinder when we are at the native 2000 EI and then with the EI changed one stop down so it becomes 1000EI. The native ISO on the left, the one stop lower EI on the right.

2000EI and 1000EI as seen in the viewfinder with NO exposure change.

2000EI and 1000EI as seen in the viewfinder with NO exposure change.

So, in the viewfinder, when you lower the EI by one stop (halving the EI) the picture becomes darker by 1 stop. If using an external monitor with a waveform display connected to SDI2 or the HDMI output this too would get darker and the waveform levels decrease by one stop.

As a camera operator, what do you do when you have a dark picture? Well most people would normally compensate for a dark looking image by opening the iris to compensate. As we have gone one stop darker with the EI gain, making the LUT 1 stop darker, to return the viewfinder image back to the same brightness as it was at the native EI you would open the iris by one stop.

So now, after reducing the EI by one stop and then compensating by opening the iris by 1 stop, the viewfinder image is the same brightness as it was when we started.

But what’s happening to my recordings?

Remember the recordings, whether on the XQD card (assuming the SD1 & Internal Rec LUT is OFF) are always at the cameras native 2000 ISO, no matter what the EI is set to. As a result, because you will have opened the iris by 1 stop to compensate for the dark viewfinder image the recording will have become 1 stop brighter. Look at the image below to see what we see in the viewfinder alongside what is actually being recorded. The EI offset exposure with aperture correction as seen in the viewfinder (left hand side) looks normal, while the actual native ISO recording (right hand side) is 1 stop brighter.

At 1000EI the Viewfinder image on the left is 1 stop darker than the actual recorded image (on the right) which is recorded at the native 2000 ISO.

VF-and-Internal

How does this help us, what are the benefits?

When you take this brighter recorded image in to post production the colorist will have to bring the levels back down to normal as part of the grading process. As he/she will be reducing the levels in post production by around 1 stop (6db) any noise in the picture will also be reduced by 6db. The end result is a picture with 6db less noise than if shot at the native EI. Another benefit may be that as the scene was exposed brighter you will be able to see more shadow information.

Is there a down side to using a low EI?

Because the actual recorded exposure is brighter by one stop you have one stop less headroom. However the PXW-FS7 has an abundance of headroom so the loss of one stop is often not going to cause a problem. I find that going between 1 and 1.5 EI stops down rarely results in any highlight issues. But when shooting very high contrast scenes and using a low EI it is worth toggling the LUT on and off to check for clipping in the SLog image.

It’s also worth noting the S-Log does not have a highlight roll off. Each stop above middle grey is recorded with the same amount of data, so exposing brighter by a stop or two does not alter the contrast as it would with a standard gamma. So over exposing log is NOT a bad thing. It is in fact in most cases highly beneficial.

Log gamma curves have very little picture information in the shadows, so if we can expose brighter our shadows will look much better. 

What is happening to my exposure range?

What you are doing is moving the mid point of your exposure range up in the case of a lower EI (up because you are opening the aperture, thus making the recordings brighter). This allows the camera to see deeper into the shadows increasing the under exposure latitude, but reduces the over exposure latitude. The reverse is also possible. If you use a higher EI you shift your mid point down. This gives you more headroom for dealing with very bright highlights, but you won’t see as far into the shadows and the final pictures will be a little noisier as in post production the overall levels will have to be brought up to compensate for the darker overall recordings.

Cine-EI allows us to shift our exposure mid point up and down.  Lowering the EI gain gives you a darker VF image so you compensate by opening the aperture which results in brightly exposed footage. This reduces over exposure headroom but increases under exposure range (and improves the signal to noise ratio). Adding EI gain gives a brighter Viewfinder image which makes you expose the recordings darker, which gives you more headroom but with less underexposure range (and a worse signal to noise ratio).

When shooting with almost any CineEI camera I will use an EI that is between 1 and 2 stops darker than the base settings. So on the FS7 I normally set the EI to 800 EI. It’s very rare to get any highlight problems at 800 EI and the improvement this low EI brings to the noise levels in the image is very nice.

Slide01

Post Production.

When shooting raw information about the EI gain is stored in the clips metadata. The idea is that this metadata can be used by the grading or editing software to adjust the clips exposure level in the edit or grading application so that it looks correctly exposed (or at least exposed as you saw it in the viewfinder via the LUT). The metadata information is recorded alongside the XAVC footage when shooting SLog2/3. However, currently few edit applications or grading applications use this metadata to offset the exposure, so S-Log2/3 material may look dark/bright when imported into your edit application and you may need to add a correction to return the exposure to a “normal” level. You can use a correction LUT to move the exposure up and when I provide LUT sets on this website I will always try to include LUT’s for over and under exposure. Another way to deal with brightly exposed log footage in post production is to first apply an “S” curve using the luma curve tool to the log. Then a simple gain adjustment will shift the exposure.

See this video for detailed information on how to expose using CineEI:


 WHAT IF YOU ARE SHOOTING USING HFR (High Frame Rate) AND LUT’S CANT BE USED.

In HFR you can either have LUT’s on for everything including internal recording, or all off, no LUT’s at all. This is not helpful if your primary recordings are internal S-Log.

So for HFR in many cases you will have to just work viewing the native S-log. If you set zebras to 70% and expose a white card at 70% this will result in S-Log footage that is 1.2 – 1.5 stops over exposed. This is the same as shooting at 800 EI and I highly recomend this approach for HFR (slow motion) shooting as it will help clean up the additional noise that you see when shooting HFR.

BAKING IN THE LUT/LOOK.

When shooting using a high or low EI, the EI gain is added or subtracted from the LUT or LOOK, this makes the picture in the viewfinder or monitor fed via the LUT brighter or darker depending on the EI used. In Cine-EI mode you want the camera to always actually record the S-log at the cameras native 2000 ISO. So normally you want to leave the LUT’s OFF for the internal recording. Just in case you missed that very important point: normally you want to leave the LUT’s OFF for the internal recording!

You need to turn ON the SD1 and Internal Rec LUT t "Bake In" a LUT. Normally leave this OFF.
You need to turn ON the SD1 and Internal Rec LUT t “Bake In” a LUT. Normally leave this OFF.

Just about the only exceptions to this might be when shooting raw or when you want to deliberately record with the LUT/Look baked in to your XQD recordings. By “baked-in” I mean with the gamma, contrast and color of the LUT/Look permanently recorded as part of the recording. You can’t remove this LUT/look later if it’s “baked-in”.

No matter what the LUT/Look settings, if you’re recording raw on an external raw recorder, recorder the raw is always recorded at 2000 ISO.  But the internal XQD recordings are different. It is possible, if you choose, to apply a LUT/LOOK to the XQD recordings by setting the “SDI1 & Internal Rec” LUT to ON. The gain of the recorded LUT/LOOK will be altered according to the CineEI gain settings. This might be useful to provide an easy to work with proxy file for editing, with the LUT/LOOK baked-in while shooting raw. Or as a way to create an in-camera look or style for material that won’t be graded. Using a baked-in LUT/LOOK for a production that won’t be graded or only have minimal grading is an interesting alternative to using Custom Mode that should be considered for fast turn-around productions.

In most cases however you will probably not have a LUT applied to your primary recordings. If shooting in S-Log you must set LUT – OFF for “SDI1 & Internal Rec” See the image above. With “SDI1 & Internal Rec” Off the internal recordings, without LUT, will be SLog2 or Slog3 and at 2000 ISO.

You can tell what it is that the camera is actually recording by looking in the viewfinder. At the center right side of the display there is an indication of what is being recorded on the cards. Normally for Cine-EI this should say either SLog2 or Slog3. If it indicates something else, then you are baking the LUT in to the internal recordings.

The internal recording gamma is shown on the right of the VF. This is recording SLog-3
The indication here shows that the 709(800) LUT is being baked-in to the internal recordings.

CINE-EI SUMMARY:

CineEI allows you to “rate” the camera at different ISO.

You MUST use a LUT for CineEI to work as designed.

A low EI number will result in a brighter exposure which will improve the signal to noise ratio giving a cleaner picture or allow you to see more shadow detail. However you will loose some over exposure headroom.

A high EI number will result in a darker exposure which will improve the over exposure headroom but decrease the under exposure range. The signal to noise ratio is worse so the final picture may end up with more noise.

A 1D LUT will not clip and appear to overexpose as readily as a 3D LOOK when using a low EI, so a 1D LUT may be preferable.

When viewing via a 709 LUT you expose using normal 709 exposure levels. Basically if it looks right in the viewfinder or on the monitor (via the 709 LUT) it almost certainly is right.

When I shoot with my FS7 I normally rate the camera at between 800 and 1000EI. I find that 5 stops of over exposure range is plenty for most situations and I prefer the decrease in noise in the final pictures. But please, test and experiment for yourself.


QUICK GUIDE TO CREATING YOUR OWN LOOK’s (Using DaVinci Resolve).

It’s very easy to create your own 3D LUT for the FS7 using DaVinci Resolve or just about any grading software with LUT export capability. The LUT should be a 17x17x17 or 33x33x33 .cube LUT. This is what Resolve creates by default and .cube LUT’s are the most common types of LUT in use today.

First simply shoot some test Slog3 clips at 2000EI. In addition you should also use the same color space (S.Gamut or S.Gamut3.cine) for the test shot as you will when you want to use the LUT. I recommend shooting a variety of clips so that you can asses how the LUT will work in different lighting situations.

Import and grade the clips from the test shoot in Resolve creating the look that you are after for your production or as you wish your footage to appear in the viewfinder of the camera. Then once your happy with the look of the graded clip, right click on the clip in the timeline and “Export LUT”. Resolve will then create and save a .cube LUT.

Then place the .cube LUT file created by the grading software on an SD card in the PMWF55_F5 folder. You may need to create the following folder structure on the SD card. So first you have a PRIVATE folder, in that there is a SONY folder and so on.

PRIVATE   :   SONY   :    PRO   :   CAMERA   :    PMWF55_F5

Put the SD card in the camera, then go to the “File” menu and go to “Monitor 3D LUT” and select “Load SD Card”. The camera will offer you a 1 to 4 destination memory selection. Choose 1,2,3 or 4, this is the memory location where the LUT will be saved. You should then be presented with a list of all the LUT’s on the SD card. Select your chosen LUT to save it from the SD card to the camera.

Once loaded in to the camera when you choose 3D User LUT’s you can select between user LUT memory 1,2,3 or 4. Your LUT will be in the memory you selected when you copied the LUT from the SD card to the camera.

Sony’s new PXW-FS7. First Impressions.

I was lucky enough to get a chance to go out and shoot with a pre-production PXW-FS7 in Amsterdam during IBC. Guess what? It makes some very nice pictures!

In case you’ve had your head in the sand the last couple of weeks the PXW-FS7 is a new super35mm camcorder from Sony. It uses the same sensor as the Sony PMW-F5 and a lot of the camera is, I am sure, shared with the F5. Even the menu’s are almost exactly the same. It can record 4K internally on XQD cards using Sony’s XAVC codec. When the cameras start shipping next month you will be able to record 3840×2160 UHD/QuadHD as well as HD. Next year there will be an update to add 4096×2160 at up to 60fps.

Sony's PXW-FS7Want to shoot slow motion? That’s no problem as the camera can go up to 180fps internally in HD and if you add an external raw recorder you can stretch that out to 240fps.

The XAVC codec options are great. You can choose between I frame for easy editing or long GoP which gives a smaller file size but needs more processing power to decode. The 10 bit 422 image quality is very similar in both cases, so choose which to use based on how much recording media you have and how powerful your edit machine is. If you still need the legacy HD XDCAM Mpeg codec then you have that too.

Extension Unit:

By adding the optional extension box to the rear of the camera you can even record ProRes HQ to the XQD cards (after a firmware update early next year). The extension box also adds the raw output needed to record raw to an external recorder such as The Odyssey 7Q or Sony R5 recorder. On top of that you also gain Timecode in and out plus genlock. To power all of this (and the camera) the extension box has a V-Mount battery plate on it’s rear. When not using the extension box the camera runs off BP-U type batteries, the same 12V batteries as used by an EX1 or PMW200 etc.

The right side of the FS7 showing the XLR connectors.

The FS7 has two different shooting modes. In custom mode the camera behaves pretty much like any other conventional camera where what you see in the viewfinder is what’s recorded on the cards. You can alter the cameras gamma curve, matrix and other settings, but basically what you see is what you get. The other mode is the CineEI mode (just like an F5 or F55) and in this mode the camera records using SGamut3.cine and S-Log3. The aim being to capture the maximum possible dynamic range and in this mode the cameras sensitivity is locked to it’s native ISO of 2000. As S-Log3 results in a very flat picture (that’s great for grading and post work) the camera includes the ability to add a range of Look Up Tables (LUT’s) to the viewfinder or HDSDI output. LUT’s help you better judge exposure and give a more pleasing image prior to grading. You can even generate your own LUT’s in software such as Resolve and load them in to the camera. For exposure assistance the camera has a range of tools including a waveform, vectorscope or histogram display as well as zebras.

The FS7's handgrip and control unit.
The FS7’s handgrip and control unit.

Ergonomically the camera is very interesting. It has Sony’s E-Mount lens mount so you can use just about any lens you want simply by adding a lens adapter. Using a metabones or Commlite adapter you can use Canon EF lenses with ease. Likewise PL or Nikon lenses with the appropriate adapters.

Designed to sit on the front of your shoulder and supplied with a handgrip on an adjustable arm (attached via a standard Arri type rosette) the camera is easy to use. There are a couple of assignable buttons on the hand grip as well as a small joystick for navigating through the cameras menu system. A large zoom rocker will control any E-Mount zoom lenses used such as the new 28-135mm f4 lens and a further assignable dial wheel can be used to control the lenses aperture or other functions. The hand grip uses the LanC protcol so it should be possible to use other LanC devices with this camera.

The PXW-FS7 with the extension unit fitted, a V-Mount battery and a Vocas base plate.

The camera is a little front heavy as it sits on the front of your shoulder. When you add the extension box and a V-mount battery the balance is much better as the weight is now set much further back. With a 3rd party shoulder mount such as the new Vocas one or the dedicated Sony VCT-FS7 mount the camera can be turned into a true shoulder mount camera.

The LCD viewfinder is mounted on a thin arm that gives it forwards and backwards adjustment as well as up and down adjustment, but there is no left right adjustment.

The viewfinder on the PXW-FS7

Overall I think the viewfinder is the weakest part of this camera. The images in the VF are quite reasonable (its 940×560 resolution) but the mounting mechanism and loupe are not the best. Maybe this will be improved before the camera ships. I made a lot of use of one of the hand grip assignable buttons to provide focus magnification while shooting to ensure focus was spot on and it’s nice to have the focus mag function so easily accessible.

One issue I did find with the arm for the hand grip was that unless you fold it up out of the way you can’t slide the camera on and off a tripod. If you are using a base plate this is less of a problem but with a bare camera it’s a bit of a pain.

The XQD card slots on the PXW-FS7, also there is an SD card slot for loading LUT's, user files and setup information.
The XQD card slots on the PXW-FS7, also there is an SD card slot for loading LUT’s, user files and setup information.

I found the operation of the camera almost identical to the PMW-F5. There are some differences however. The FS7 does not have a 2K center scan mode for the sensor. This is used on the F5/F55 to eliminate aliasing problems when shooting above 60fps where the 4K sensor is read out as a 2K sensor. On the F5/F55 if you don’t want to use the 2K center scan mode you can fit a special 2K low pass optical filter to eliminate aliasing above 60fps, but again this is not possible on the FS7.

Another thing the FS7 doesn’t have is the large side display of the F5 and F55. For conventional shooting this is not really a big deal. But if you are using the CineEI mode where you may be using LUT’s on different outputs not having this information clearly displayed is a bit of a nuisance. In fact during the shoot with the FS7 at one point I though I was shooting with a LUT when in fact I was not. The only way to be sure of how everything is set is to go into the cameras menu system.

The PXW-FS7 fitted with the 28-135mm f4 servo zoom lens.

But what about the image quality? Frankly it’s amazing! For the money the images this camera produces are remarkable. It is using the F5’s sensor and it does have 14 stops of dynamic range. S-log3 is a great gamma curve and the camera is very low noise, even at it’s native 2000 ISO. It was hard to tell as most of the shooting took place at night, but initially it doesn’t look like there is any difference between the quality of the footage from the FS7 and the PMW-F5. Great colours, low noise, high dynamic range with very pleasing roll off what more can you want? One area where there will be a difference is with raw. The PMW-F5 takes the Sony R5 directly docked on it’s back. The raw form the F5 is 16 bit while the raw from the FS7 is going to be recorded on an external recorder at only 12 bits. 12 bit linear raw is really pushing the limits of what is needed for linear raw. However we do already know that the 12 bit raw from Sony’s FS700 works well, so this should be no different.

Where this camera will be really good is when combined with the new 28-135mm f4 servo zoom lens. Typically par-focal lenses with this kind aperture and zoom ratio cost in excess of $30K. This lens will be around $2.7K. Being able to zoom in and out on a large sensor camera smoothly really increases the cameras flexibility making it much easier to use in run and gun type situations. The lens is never going to be an incredible performer at this price and when wide open I did find it a little soft, but for shear ease of use it’s really remarkable. The FS7 combined with this lens will be a killer combination and that’s why I have ordered one. It’s NOT replacing my F5, I love my F5 and I think that the F5 is a much better camera for drama or studio type shoots. But the FS7 will be very handy for fast and fluid productions. In addition, for the money this camera is an absolute bargain.

Exposing and Using S-Log2 on the Sony A7s. Part One: Gamma and Exposure.

This guide is for the A7S and A7SII. The A7SIII does not in my opinion need the same degree of over exposure as documented here. So please bear this in mind if using the A7SIII.

This document has been prepared independently of Sony. It is based on my own findings having used the camera and tested various exposure levels and methods. Part 2 which explains how to use LUT’s to correct the footage in the edit suite or post production is here: https://www.xdcam-user.com/2014/10/using-s-log2-from-the-a7s-in-post-production/

If you find this useful please consider buying me a coffee or a beer. I’m not paid to write these articles.


Type


One of the really nice features of the Sony A7s and Sony’s other Alpha cameras, including the A6300, A6500 etc is the ability to use different gamma curves and in particular the Sony S-Log2 gamma curve.

What are gamma curves?

All conventional cameras use gamma curves. The gamma curve is there to make the images captured easier to manage by making the file size smaller than it would be without a gamma curve. When TV was first developed the gamma curve in the camera made the signal small enough to be broadcast by a transmitter and then the gamma curve in the TV set (which is the inverse of the one in the camera) expanded the signal back to a normal viewing range. The current standard for broadcast TV is called “Recommendation BT-709”, often shortened to Rec-709. This gamma curve is based on standards developed over 60 years ago and camera technology has advanced a lot since then! Even so, almost every TV and monitor made today is made to the Rec-709 standard or something very similar. Many modern cameras can capture a brightness range, also known as dynamic range, that far exceed the Rec-709 standard.

The limitations of standard gammas.

As gamma effects the dark to light range of the image, it also effects the contrast of the image. Normal television gamma has a limited dynamic range (about 6 to 7 stops) and as a result also has a limited contrast range.

When shooting a high contrast scene with conventional gamma the brightest highlights and the darkest shadows cannot be recorded.
When shooting a high contrast scene with conventional gamma the brightest highlights and the darkest shadows cannot be recorded. The contrast on the TV or monitor will however be correct as the camera captures the same contrast range as the monitor is able to display.

Normally the gamma curve used in the camera is designed to match the gamma curve used by the TV or monitor. This way the contrast range of the camera and the contrast range of the display will be matched. So the contrast on the TV screen will match the contrast of the scene being filmed and the picture will look “normal”. However the limited dynamic range may mean that very bright or very dark objects cannot be accurately reproduced as these may exceed the gammas dynamic range.

Although the dynamic range of Rec-709 may not always capture the entire range of the scene being shot, as the gamma of the camera matches the gamma of the TV the contrast will appear correct.

The over exposure typical of a restricted range gamma such as Rec-709  is commonly seen as bright clouds in the sky becoming white over exposed blobs or bright areas on faces becoming areas of flat white. Objects in shade or shadow areas of the scene are simply too dark to be seen. But between the overexposed areas and any under exposure the contrast looks natural and true to life.

Typical limited Rec-709 exposure range. Contrast is good but the clouds are over exposed and look un-natural.

Log Gamma.

Log gamma, such as Sony’s S-Log2, allows the camera to capture a much greater brightness range or dynamic range than is possible when shooting with conventional television gamma. Dynamic range is the range from light to dark that the camera can capture or the range that the monitor or TV can display within one image. It is the range from the deepest blacks to the brightest whites that can be captured or shown at the same time.

There are some things that need to be considered before you get too excited about the possibility of capturing this much greater dynamic range. The primary one being that if the camera is set to S-log2 and the TV or monitor is a normal Rec-709 TV (as most are) then there is no way the TV can correctly display the image being captured, the TV just doesn’t have the range to show everything that the camera with it’s high range log gamma can capture accurately.

Fixed Recording Range For Both Standard and Log Gamma.

The signal range and signal levels used to record a video signal are normally described in percent. Where black is 0% and the brightest thing that can be recorded is normally recorded at 100% to 109%. Most modern video cameras actually record the brightest objects at 109%. The important thing to remember though is that the recording range is fixed. Even when you change gamma curve the camera is still constrained by the zero to 109% recording range. The recording range does not change whether you are recording Rec-709 or S-log2. So log gamma’s like S-Log2 must squeeze a much bigger signal range into the same recording range as used by conventional Rec-709 recordings.

Log gamma squeezes the scenes large range to fit in the camera's normal 0%-109% recording range.
Log gamma squeezes the scenes large range to fit in the camera’s normal 0%-109% recording range.

Recording S-Log2.

In order to record using S-log2 with the A7s you need to use a picture profile. The picture profiles give you several recording gamma options. For S-log2 you should use Picture Profile 7 which is already set up for S-log2 and S-Gamut by default (for information on gamuts see this article). In addition you should ALWAYS use the cameras native ISO which is 3200 ISO and it is normally preferable to use a preset white balance. Using any other ISO with S-log2 will not allow you to get the full benefit of the full 14 stops of dynamic range that S-log2 can deliver. In most of the Alpha cameras you now also have the ability to use a different version of S-log, – S-Log3 and this is found in picture profiles 8 and 9. You can use S-Log3 if you wish, but S-Log2 was designed from the outset by Sony to work with digital camera sensors. S-Log3 is based on an older curve designed for film transfers to a 10 bit recording. As a result when using a camera that only has 8 bit recording with a limited number of code values, S-Log2 tends to be more efficient and yield a better end result. This is what it was designed for.

Grey Cards and White Cards.

Before I go further let me introduce you to grey and white cards in case you have not come across them before. Don’t panic you don’t have to own one, although I would recommend getting a grey card such as the Lastolite EzyBalance if you don’t have one. But it is useful to understand what they are.

The 90% White Card.

The 90% white card is a card or chart that reflects 90% of the light falling on it. This will be a card that looks very similar in brightness to a piece of ordinary white paper, it should be pure white, some printer papers are bleached or coloured very slightly blue to make them appear “brilliant white”  (as you will see later in many cases it is possible to use an ordinary piece of white paper in place of a 90% white card for exposure).

The Grey Card.

The 18% grey card, also often called “middle grey” card, is a card that reflects 18% of the light falling on it. Obviously it will appear much darker than the white card. Visually to us humans an 18% grey card appears to be half way between white and black, hence it’s other name, “middle grey”.

Middle grey is important because the average brightness level of most typical scenes tends to be around the middle grey brightness value. Another key thing about middle grey is that because it falls in the middle of our exposure range it makes it a very handy reference level when measuring exposure as it is less likely to be effected by highlight compression than a 90% white card.

Exposing White and Middle Grey.

Coming back to Rec-709 and conventional TV’s and monitors. If we want a piece of white paper to look bright and white on a TV we would record it and then show it at somewhere around 85% to 95% of the screens full brightness range. This doesn’t leave much room for things brighter than a white piece of paper! Things like clouds in the sky, a shiny car, a bright window or a direct light source such as a lamp or other light.  In order to make it possible for S-log2 to record a much greater dynamic range the recording level for white and mid tones is shifted down. Instead of recording white at 85%-95%, when using S-log2 or S-Log3 it is recommended by Sony that white is recorded at around 60%. For S-Log2 Middle grey moves down too, instead of being recorded at 42%-43% (the normal level for Rec-709) it’s recorded at just 32% with S-Log2 (S-log3 uses 41%).

By recording everything white (ie a white piece of paper) and darker in a  lower range, we free up  lot of extra space above the white recording level, within the full recording range, to record all those bright highlights in any scene that would be impossible to record with conventional gammas where there is only 10% to 20% from white at 90% to the peak of the recording range at 100 to 109%.

To make room for the extra dynamic range and the ability to record very bright objects, white and mid tones are shifted down in level.
To make room for the extra dynamic range and the ability to record very bright objects, white and mid tones are shifted down in level by the S-log2 gamma curve. As a result, white, mid tones etc will be displayed darker than normally expected with conventional gamma.

As S-Log2 and S-Log3 normally shift a lot of the recording levels downwards, if we show a scene shot with S-Log2 or S-log3 that has been exposed correctly on a conventional TV or monitor it will look dark due to the lower recording levels. In addition it will look flat with very low contrast as we are now squeezing a much bigger dynamic range into the limited conventional Rec-709 display range of a normal TV or computer monitor.

The on screen contrast appears reduced as the capture contrast is greater than the display contrast.

This on screen reduction in contrast and the darker levels are actually perfectly normal when shooting using log gamma, this is how it is supposed to look on a normal monitor or TV. So don’t be alarmed if when shooting using S-Log your images look a little darker and flatter than perhaps you are used to when shooting with a standard gamma. You will adjust the S-Log footage in post production to restore the brightness and contrast later.

Correctly exposed S-Log2 can look dark and washed out.

The post production adjustment of S-Log2 and S-log3 is very important and one of the keys to getting the very best finished images. The S-Log recording acts as a digital negative and by “processing” this digital negative in post production (normally referred to as “grading”) we manipulate the large 14 stop dynamic range of the captured image to fit within the limited display range of a Rec-709 TV in a pleasing manner. This may mean pulling up the mid range a bit, pulling down the highlights and bit and generally shifting the brightness and colour levels of different parts of the image around  (see PART 2 for more post production information).

SLog-2 and 10 bit or 8 bit data.

Originally Slog-2 was designed for use on high end digital cinema cameras such as Sony’s F65 camera. These cameras have the ability to record using 10 bit data. A 10 bit recording can have up to around 1000 shades of grey from black to white. The A7s however uses 8 bit recording which only has a maximum of 235 shades from black to white. Normally 8 bit recording is perfectly OK as most transmission and display standards are also 8 bit. Shoot with an 8 bit camera and then display that image directly via an 8 bit system and nothing is lost. However when you start to grade and manipulate the image the difference between 8 bit and 10 bit becomes more significant. If you start to shift levels around, perhaps stretching out some parts of the image then the increased tonal resolution of a 10 bit recording helps maintain the very highest image quality. Photographers that have shot using both jpeg and raw will know how much more flexibility the 12 bit (or more) raw files have compared to the 8 bit jpeg’s. However they will also know that 8 bit jpeg’s can be also adjusted, provided you don’t need to make very large adjustments.

Contrary to popular belief heavy grading of 8 bit footage does not necessarily lead to banding in footage across smooth surfaces except in extreme cases. Banding is more commonly a result of compression artefacts such as macro blocking. This is especially common with very highly compressed codecs such as AVCHD. The 50Mbps XAVC-S codec used in the Sony Alpha cameras is a very good codec, far superior to AVCHD and as a result compression artefacts are significantly reduced, so banding will be less of an issue than with other lower quality codecs. If you’re going to shoot using S-Log2, some grading will be necessary and as we only have 8 bit recordings we must take care to expose our material in such a way as to minimise how far we will need to push and pull the material.

Getting Your Exposure Right.

When S-Log2 was developed the engineers at Sony produced tables that specified the correct exposure levels for s-Log2 which are:

exposure table1As you can see the nominal “correct” exposure for S-Log2 is a lot lower than the levels used for display on a typical Rec-709 TV or monitor. This is why correctly exposed s-log2 looks dark on a conventional TV. The implication of this is that when you grade your footage in post production you will have to shift the S-log2 levels up quite a long way. This may not be ideal with an 8 bit codec, so I decided to carefully test this to determine the optimum exposure level for the A7s.

Correct Exposure.

The panel of images below is from the A7s recording S-log2 and exposed at the Sony recommended “correct” 32% middle grey level. The correct exposure was determined using a grey card and an external waveform monitor connected to the cameras HDMI output. Then the S-log2 was corrected in post production to normal Rec-709 levels using a Look Up Table (LUT – more on LUT’s in part 2). You can also see the viewfinder display from the camera. If you click on the image below you can expand it to full size. Sorry about the shadow from the laundry line, I didn’t see this when I was shooting the test shots!

Correctly exposed S-Log2 from A7s.

From this you can see just how dark and low contrast looking the original correctly exposed S-log2 is and how much more vibrant the corrected Rec-709 image is. I have also indicated where on the cameras histogram middle grey and white are. Note how much space there is to the right of white on the histogram. This is where the extra highlight or over exposure range of S-log2 can be recorded. When correctly exposed S-log2 has an exposure range of 6 stops above middle grey and 8 stops under.

Over Exposing or “Pushing” S-log2.

If we deliberately raise the exposure level above the Sony recommended levels (known as pushing the exposure), assuming you grade the image to the same final levels some interesting things happen.

For each stop we raise the exposure level you will have 1 stop (which is the same as 6db) less noise. So the final images will have half as much noise for each stop up you go. This is a result of exposing the image brighter and as a result not needing to raise the levels in post as far as you would if exposed at the normal level.

You will loose one stop of over exposure headroom, but gain one stop of under exposure headroom.

Bright highlights will be moved upwards into the most compressed part of the log gamma curve. This can result in a loss of texture in highlights.

Skin tones and mid tones move closer to normal Rec-709 levels, so less manipulation is need for this part of the image in post production.

This last point is important for the A7s with it’s 8 bit codec, so this is the area I looked at most closely. What happens to skin tones and textures when we raise the exposure?

Exposing at +1, +2 and +3 Stops.

Below are another 3 panels from the A7s, shot at +1 stop, +2 stops and +3 stops. Again you can click on the images if you wish to view them full size.

A7s S-Log2 over exposed by one stop.
A7s S-Log2 over exposed by 2 stops.
A7s S-Log2 over exposed by 3 stops.

Looking at these results closely you can see that when you increase the exposure by 1 stop over the Sony specified correct level for S-log2 there is a very useful reduction in noise, not that the A7s is particularly noisy to start with, but you do get a noticeably cleaner image.

Below are 4 crops from the same images, after grading. I really recommend you view these images full size on a good quality monitor. Click on the image to view larger or full size.

Crops at different exposure of LUT corrected A7s S-log2 footage.

The noise reduction at higher exposures compared to the base exposure is very clear to see if you look at the black edge of the colour checker chart (the coloured squares), although the difference between +2 and +3 stops is very small. You can also see further into the shadows in the +3 stop image compared to the base exposure. A more subtle but important effect is that as the exposure goes up the visible texture of the wooden clothes peg decreases. The grain can be clearly seen at the base level but by +3 stops it has vanished. This is caused by the highlights creeping into the more compressed part of the log gamma curve. The same thing is happening to the skin tones in the +3 stop image, there is some reduction of the most subtle textures.

From this we can see that for mid tones and skin tones you can afford to expose between 1 and 2 stops above the Sony recommended base level. More than 2 stops over and brighter skin tones and any other brighter textures start to be lost. The noise reduction gain by shooting between one and 2 stops over is certainly beneficial. The down side to this though is that we are reducing the over amount of exposure headroom.

As you raise the exposure level you reduce the over exposure headroom.

Given everything I have seen with this 8 bit and almost every other 8 bit camera my recommendation is to shoot between the Sony recommended base S-log2 level and up to two stops over this level. I would try to avoid shooting more than 2 stops over as this is where you will start to see some loss of texture in brighter skin tones and brighter textures.  Exactly where you set your exposure will depend on the highlights in the scene. If you are shooting a very bright scene you will possibly need to shoot at the Sony recommended level to get the very best over exposure headroom. If you are able to expose higher without significantly compromising any highlights then you should aim to be up to 2 stops over base. But whatever you do never expose darker than the Sony base level, this will normally look really nasty.

Determining The Correct Exposure.

The challenge of course is determining where your exposure actually is. Fortunately as we have seen, provided you in the right ball park, S-log2 is quite forgiving, so if you are a little bit over exposed it’s probably not going to hurt your images much. If you have a waveform monitor then you can use that to set your exposure according to the table below. If you don’t have proper white or grey cards you can use a piece of normal white paper. Although slightly less accurate this will get you very close to where you want to be. Do note that white paper tends to be a little brighter than a dedicated 90% reflectivity white card. If you don’t have any white paper then you can use skin tones, again a bit less accurate but you should end up in the right zone.

My suggested exposure levels for the Sony A7s. The "sweet spot" is from normal to +2 over.
My suggested exposure levels for the Sony A7s. The “sweet spot” is from normal to +2 over.

If you don’t have an external waveform monitor then you do still have some good options. Sadly although the camera does have zebras, these are not terribly useful for S-log2 as the lowest the zebras can go is 70%.

Light Meter: You could use a conventional photography light meter. If you do choose to use a light meter I would recommend checking the calibration of the light meter against the camera first.

Mark 1 Eyeball: You could simply eyeball the exposure looking at the viewfinder or rear screen but this is tricky when the image is very flat.

In Camera Metering: The cameras built in metering system, like the majority of DSLR’s is calibrated for middle grey. By default the camera uses multi-point metering to measure the average brightness of several points across the scene to determine the scenes average brightness and from there set the correct base S-log2 exposure.

Auto Exposure:

When you are using S-Log2, auto exposure in most cases will be very close to the correct base exposure if you use the default Multi-Zone exposure metering. The camera will take an average exposure reading for the scene and automatically adjust the exposure to the Sony recommended 32% middle grey exposure level based on this average. In the P, A and S modes you can then use the exposure compensation dial to offset the exposure should you wish. My recommendation would be to add +1 or +2 stops via the dial. Then observe the histogram to ensure that you don’t have any significant over exposure. If you do then reduce the exposure compensation. Lots of peaks to the far right of the histogram is an indication of over exposure.

Manual Exposure And Internal Metering.

If you are exposing manually you will see a small M.M. indication at the bottom of the LCD display with a +/- number. In the eyepiece viewfinder this appears as a scale that runs from -5 to +5, in S-log2 only the -2 to +2 part of the scale is used. In both cases this is how far the camera thinks you are away from the optimum exposure. + meaning the camera is over exposed, – meaning under.

A7s Viewfinder indications in manual exposure mode showing both M.M. offset from metered exposure and histogram.

In the image above we can see the M.M. indication is +0.3, in the eyepiece you would see a small arrow one bar to the right of “0” , indicating the cameras multi zone metering thinks the shot is just a little over exposed, even though the shot has been carefully exposed using a grey card and external waveform monitor. This error is probably due to the large amount of white in the shot, white shirt, white card, test charts with a lot of brighter than grey shades.  In practice an error of 0.3 of a stop is not going to cause any real issues, so even if this was exposed by setting  the exposure so that you have “M.M. 0.0” the exposure would be accurate enough. But it shows that multi point exposure averaging is easily confused.

The scene above is a fairly normal scene, not excessively bright, not particularly dark. If shooting a snow scene for example the cameras multi point averaging would almost certainly result in an under exposed shot as the camera attempts to bring the bright snow in the scene down to the average middle grey level. If shooting a well lit face against a very dark background then the averaging might try to bring the background up and the shot may end up overexposed.

If you want really accurate exposure then you should put the cameras metering system into the spot metering mode where instead of taking an average of various points across the scene the camera will just measure the exposure at the very center of the image.

A7s Spot Metering Mode.

You can then use a grey card to very accurately set the exposure. Simply place the circular shaped symbol at the center of the viewfinder display over a grey card and set the exposure so that M.M is 0.0 for the correct S-Log2 base exposure. To expose 1 stop over with a grey card, set M.M. +1.0 and two stops over M.M. +2.0 (not flashing, flashing indicates more than +2 stops).

Using Spot Metering to set exposure correctly for S-log2. MM 0.0.

One small issue with this is that the camera will only display a M.M. range of -2.0 to +2.0 stops. Provided you don’t want to go more than 2 stops over base then you will be fine with a grey card.

Using White Instead of Grey:

If you don’t have a grey card then you can use a 90% reflectivity white target. As white is 2 stops brighter than middle grey when S-Log2 is correctly exposed the 90% white should indicate M.M +2.0.

Using spot metering to set the correct exposure for S-Log2. M.M should read M.M +2.0 for a 90% reflectivity white target.

Once you have established the correct exposure you can then open the iris by 1 or two stops to increase the exposure. Or halve the shutter speed to gain a one stop brighter exposure. Each time you halve the shutter speed your exposure becomes one stop brighter, so divide the shutter speed by 4 to gain a 2 stop increase in exposure. As always you should observe the histogram to check for any over exposure. White peaks at the far right of the histogram or disappearing completely off the right of the histogram is an indication of over-exposure. In this case reduce your exposure back down towards the base exposure level (M.M 0.0 with a a grey card).

Exposure Summary:

I recommend using an exposure between the “correct” base S-Log2 exposure level of middle grey at 32% and two stops over this. I would not recommend going more than 2 stops over over base.

In the P, A and S auto exposure modes, when using the default multi-zone metering the camera will set the base S-log2 exposure based on the average scene brightness. For most typical scenes this average should be very close to middle grey. This exposure can then be increased (brightened) by up to 2 stops using the exposure compensation dial.

In manual exposure the “M.M.” number displayed at the bottom of the viewfinder display is how far you are from the correct base S-log2 exposure. M.M. +2.0 indicates +2 stops over base. If using multi zone metering (the cameras default) this exposure will be based on the scenes average brightness.

If you set the metering to “Spot” you can use a grey card centred in the image to determine the correct base exposure and up to 2 stops of over exposure via the M.M. indication when shooting manually.

In Part 2:

In part two I will take a look at grading the S-log2 from the A7s and how to get the very best from the S-log2 images by using Look Up Tables (LUT’s).

PART 2 – How to handle the footage in post production is here.

NORTHERN LIGHTS Tours and workshops.

Don’t forget I run storm chasing and Northern Lights expeditions every year.  These are amazing expeditions by snowmobile up on to the Finnmarksvidda. We go ice fishing, dog sledding, exploring, cook a meal in a tent and enjoy traditional Norwegian saunas.

More information here.

Northern Lights over our cabins in Norway.

10 days with the A7s. I LOVE this camera!

So I have had my A7s for 10 days now. I took it on holiday with me shooting both stills and video, getting a feel for the camera in a wide range of situations from brilliant sunshine to shooting under candlelight.

It has been an absolute delight using it, with one small caveat: No ND filters built in and boy, does this camera need ND filters! I see that there are now some lens adapters with ND faders built in from Fotodiox and HolyManta. I hope to test these soon, but these ND  adapters are dumb adapters so only for fully manual lenses. So a set of front of lens ND’s or a good ND fader is essential to get the best from the A7s.

Lens wise I don’t have the greatest range of full frame lenses. I have my Samyang 24, 35 and 85mm full frame primes which work really well with the camera and the Sony 28-70mm f3.5-f5.6 kit lens and some old f1.4 nikkors. Actually the kit lens has really surprised me, for what it is, it does give a nice image. Almost all my lenses are Canon EF mount so I have been using an adapter. The one I have is the Commlite Full frame E to EF smart adapter, which has worked perfectly (it supports a wider range of lenses than my early model metabones adapter). For some longer focal lengths I’ve been playing with the new Tamron 16-300mm APS-C lens. One side note is that if you use an APS-C lens with a 1.4x teleconverter, in most cases the image circle will then fill the full frame sensor. I will be testing this further and posting some sample images soon. This might be handy for 4K video when you really need to use the full sensor.

Anyway, back to the camera. I had forgotten how nice full frame can be to work with. For photo’s the shallow DoF is a delight. For video you have much greater control over your DoF. As the camera is 3200 ISO you can shoot in the dark with ease and get very natural looking images without having to add extra light. SLog2 is great for capturing a huge dynamic range video. Today and tomorrow I am pushing the Slog2 though some torture and exposure tests to find the exposure sweet spot for Slog2 and 8 bit recordings. I’m also developing some LUT’s to use with the camera and I’ll have a full workflow guide to slog2 on the A7s in the next couple of weeks.

I really love that this little camera can shoot video that is of really remarkably good quality. Most people don’t realise your shooting video with it. It’s really quite scary just how good the video is, it’s starts you thinking… do I need an F5 when the video from the A7s is so good? But then when I started to set up the A7s for my Slog2 torture tests and added a monitor, the battery to power the monitor, rods, matte box, external recorder etc it soon turned into a frankenstien monster of a camera rig. The F5 is so much nicer to use in this respect. For casual shooting, covert filming or as a grab camera the A7s is pretty incredible and I will use it for a lot of things, but it’s not a replacement for my F5/R5.

One very nice feature of the A7s is the silent shutter stills mode. In this mode the camera makes use of the sensors electronic shutter rather that the cameras mechanical curtain shutter. This is great for time-lapse as you won’t wear out the mechanical shutter. The only down side is that when I use a DSLR for time-lapse I often make use of the large frame size from a 24MP or more sensor to re-frame or pan and scan the shot in post. The A7s is only 12.2MP or 4,240 x 2,832 pixels so very little room for re-framing in a 4K production, although not too bad for an HD programme. I wish the vanilla A7 had this feature, it would make it a great time-lapse camera. One application I’m very excited about is using the A7s to shoot the northern lights in both time-lapse and real time next year during my Northern Lights expeditions and workshops.

Keep an eye out for my Slog2 guide in the next week or so where I’ll document my findings on how to get the very best from the A7s. It’s an amazing little camera. Can’t wait for the 4K recording options for the camera to become a reality. Maybe we will find out more at IBC.


What is a Gamut or Color Space and why do I need to know about it?

Well I have set myself quite a challenge here as this is a tough one to describe and explain. Not so much perhaps because it’s difficult, but just because it’s hard to visualise, as you will see.

First of all the dictionary definition of Gamut is “The complete range or scope of something”.

In video terms what it means is normally the full range of colours and brightness that can be either captured or displayed.

I’m sure you have probably heard of the specification REC-709 before. Well REC-709, short for ITU-R Recommendation, Broadcast Television, number 709. This recommendation sets out the display of colours and brightness that a television set or monitor should be able to display. Note that it is a recommendation for display devices, not for cameras, it is a “display reference” and you might hear me talking about when things are “display referenced” ie meeting these display standards or “scene referenced” which would me shooting the light and colours in a scene as they really are, rather than what they will look like on a display.

Anyway…. Perhaps you have seen a chart or diagram that looks like the one below before.

Sony colour gamuts.
Sony colour gamuts.

Now this shows several things. The big outer oval shape is what is considered to be the equivalent to what we can see with our own eyes. Within that range are triangles that represent the boundaries of different colour gamuts or colour ranges. The grey coloured triangle for example is REC-709.

Something useful to know is that the 3 corners of each of the triangles are whats referred to as the “primaries”. You will hear this term a lot when people talk about colour spaces because if you know where the primaries (corners) are, by joining them together you can find the size of the colour space or Gamut and what the colour response will be.

Look closely at the chart. Look at the shades of red, green or blue shown at the primaries for the REC-709 triangle. Now compare these with the shades shown at the primaries for the much larger F65 and F55 primaries. Is there much difference? Well no, not really. Can you figure out why there is so little difference?

Think about it for a moment, what type of display device are you looking at this chart on? It’s most likely a computer display of some kind and the Gamut of most computer displays is the same size as that of REC-709. So given that the display device your looking at the chart on can’t actually show any of the extended colours outside of the grey triangle anyway, is it really any surprise that you can’t see much of a difference between the 709 primaries and the F65 and F55 primaries. That’s the problems with charts like this, they don’t really tell you everything  that’s going on. It does however tell us some things. Lets have a look at another chart:

SGamuts Compared.
SGamuts Compared.

This chart is similar to the first one we looked at, but without the pretty colours. Blue is bottom left, Red is to the right and green top left.

What we are interested in here is the relationship between the different colour space triangles.  Using the REC-709 triangle as our reference (as that’s the type of display most TV and video productions will be shown on) look at how S-Gamut and S-Gamut3 is much larger than 709. So S-Gamut will be able to record deeper, richer colours than 709 can ever hope to show. In addition, also note how S-Gamut isn’t just a bigger triangle, but it’s also twisted and distorted relative to 709. This is really important.

You may also want to refer to the top diagram as well as I do my best to explain this. The center of the overall gamut is white. As you draw a line out from the center towards the colour spaces primary the colour becomes more saturated (vivid). The position of the primary determines the exact hue or tone represented. Lets just consider green for the moment and lets pretend we are shooting a shot with 3 green apples. These apples have different amounts of green. The most vivid of the 3 apples has 8/10ths of what we can possibly see, the middle one 6/10ths and the least colourful one 4/10ths. The image below represents what the apples would look like to us if we saw them with our eyes.

The apples as we would see them with our own eyes.

If we were shooting with a camera designed to match the 709 display specification, which is often a good idea as we want the colours to look right on the TV, the the greenest, deepest green we can capture is the 709 green primary. lets consider the 709 green primary to be 6/10ths with 10/10ths  being the greenest thing a human being can see. 6/10ths green will be recorded at our peak green recording level so that when we play back on a 709 TV it will display the greenest the most intense green that the display panel is capable of.  So if we shoot the apples with a 709 compatible camera, 6/10ths green will be recorded at 100% as this is the richest green we can record (these are not real levels, I’m just using them to illustrate the principles involved) and this below is what the apples would look like on the TV screen.

6/10ths Green and above recorded at 100% (our imaginary rec-709)

So that’s rec-709, our 6/10ths green apple recorded at 100%. Everything above 6/10 will also be 100% so the 8/10th and 6/10ths green apples will look more or less the same.

What happens then if we record with a bigger Gamut. Lets say that the green primary for S-Gamut is 8/10ths of visible green. Now when recording this more vibrant 8/10ths green in S-Gamut it will be recorded at 100% because this is the most vibrant green that S-Gamut can record and everything less than 8/10 will be recorded at a lower percentage.

But what happens if we play back S-Gamut on a 709 display? Well when the 709 display sees that 100% signal it will show 6/10ths green, a paler less vibrant shade of green than the 8/10ths shade the camera captured because 6/10ths is the most vibrant green the display is capable of. All of our colours will be paler and less rich than they should be.

The apples recorded using a big gamut but displayed using 709 gamut.

So that’s the first issue when shooting with a larger colour Gamut than the Gamut of the display device, the saturation will be incorrect, a dark green apple will be pale green. OK, that doesn’t sound like too big a problem, why don’t we just boost the saturation of the image in post production? Well if the display is already showing our 100% green S-Gamut signal at the maximum it can show (6/10ths for Rec-709) then boosting the saturation won’t help colours that are already at the limit of what the display can show simply because it isn’t capable of showing them any greener than they already look. Boosting the saturation will make those colours not at the limit of the display technology richer, but those already at the limit won’t get any more colourful. So as we boost the saturation any pale green apples become greener while the deep green apples stay the same so we loose colour contrast between the pale and deep green apples. The end result is an image that doesn’t really look any different that it would have done if shot in Rec-709.

Saturation boosted S-Gamut looks little different to 709 original.
Sony colour gamuts.
Sony colour gamuts.

But, it’s even worse that just a difference to the saturation. Look at the triangles again  and compare 709 with S-Gamut. Look at how much more green there is within the S-Gamut colour soace than the 709 colour space compared to red or blue.  So what do you think will happen if we try to take that S-Gamut range and squeeze it in to the 709 range? Well there will be a distinct colour shift towards green as we have a greater percentage of green in S-Gamut than we should have in Rec-709 and that will generate a noticeable colour shift and the skewing of colours.

Squeezing S-Gamut into 709 will result in a colour shift.

This is where Sony have been very clever with S-Gamut3. If you do take S-Gamut and squeeze it in to 709 then you will see a colour shift (as well as the saturation shift discussed earlier). But with S-Gamut3 Sony have altered the colour sampling within the colour space so that there is a better match between 709 and S-Gamut3. This means that when you squeeze S-Gamut3 into 709 there is virtually no colour shift. However S-Gamut3 is still a very big colour space so to correctly use it in a 709 environment you really need to use a Look Up Table (LUT) to re-map it into the smaller space without an appreciable saturation loss, mapping the colours in such a way that a dark green apple will still look darker green than a light green apple but keeping within the boundaries of what a 709 display can show.

Taking this one step further, realising that there are very few, if any display devices that can actually show a gamut as large as S-Gamut or S-Gamut3, Sony have developed a smaller Gamut known as S-Gamut3.cine that is a subset of S-Gamut3.

The benefit of this smaller gamut is that the red green and blue ratios are very close to 709. If you look at the triangles you can see that S-Gamut3.cine is more or less just a larger version of the 709 triangle. This means that colours shifts are almost totally eliminated making this gammut much easier to work with in post production. It’s still a large gamut, bigger than the DCI-P3 specification for digital cinema, so it still has a bigger colour range than we can ever normally hope to see, but as it is better aligned to both P3 and rec-709 colourists will find it much easier to work with. For productions that will end up as DCI-P3 a slight saturation boost is all that will be needed in many cases.

So as you can see, having a huge Gamut may not always be beneficial as often we don’t have any way to show it and simply adding more saturation to a seemingly de-saturated big gamut image may actually reduce the colour contrast as our already fully saturated objects, limited by what a 709 display can show, can’t get any more saturated. In addition a gamut such as S-Gamut that has a very different ratio of R, G and B to that of 709 will introduce colour shifts if it isn’t correctly re-mapped. This is why Sony developed S-Gamut3.cine, a big but not excessively large colour space that lines up well with both DCI-P3 and Rec-709 and is thus easier to handle in post production.

Correct exposure levels with Sony Hypergammas and Cinegammas.

When an engineer designs a gamma curve for a camera he/she will be looking to achieve certain things. With Sony’s Hypergammas and Cinegammas one of the key aims is to capture a greater dynamic range than is possible with normal gamma curves as well as providing a pleasing highlight roll off that looks less electronic and more natural or film like.

Recording a greater dynamic range into the same sized bucket.

To achieve these things though, sometimes compromises have to be made. The problem being that our recording “bucket” where we store our picture information is the same size whether we are using a standard gamma or advanced gamma curve. If you want to squeeze more range into that same sized bucket then you need to use some form of compression. Compression almost always requires that you throw away some of your picture information and Hypergamma’s and Cinegamma’a are no different. To get the extra dynamic range, the highlights are compressed.

Compression point with Hypergamma/Cinegamma.

To get a greater dynamic range than normally provided by standard gammas the compression has to be more aggressive and start earlier. The earlier (less bright) point at which the highlight compression starts means you really need to watch your exposure. It’s ironic, but although you have a greater dynamic range i.e. the range between the darkest shadows and the brightest highlights that the camera can record is greater, your exposure latitude is actually smaller, getting your exposure just right with hypergamma’s and cinegamma’s is very important, especially with faces and skin tones. If you overexpose a face when using these advanced gammas (and S-log and S-log2 are the same) then you start to place those all important skin tone in the compressed part of the gamma curve. It might not be obvious in your footage, it might look OK. But it won’t look as good as it should and it might be hard to grade. It’s often not until you compare a correctly exposed sot with a slightly over shot that you see how the skin tones are becoming flattened out by the gamma compression.

But what exactly is the correct exposure level? Well I have always exposed Hypergammas and Cinegammas about a half to 1 stop under where I would expose with a conventional gamma curve. So if faces are sitting around 70% with a standard gamma, then with HG/CG I expose that same face at 60%. This has worked well for me although sometimes the footage might need a slight brightness or contrast tweak in post the get the very best results. On the Sony F5 and F55 cameras Sony present some extra information about the gamma curves. Hypergamma 3 is described as HG3 3259G40 and Hypergamma 4 is HG4 4609G33.
What do these numbers mean? lets look at HG3 3259G40
The first 3 numbers 325 is the dynamic range in percent compared to a standard gamma curve, so in this case we have 325% more dynamic range, roughly 2.5 stops more dynamic range. The 4th number which is either a 0 or a 9 is the maximum recording level, 0 being 100% and 9 being 109%. By the way, 109% is fine for digital broadcasting and equates to bit 255 in an 8 bit codec. 100% may be necessary for some analog broadcasters. Finally the last bit, G40 is where middle grey is supposed to sit. With a standard gamma, if you point the camera at a grey card and expose correctly middle grey will be around 45%. So as you can see these Hypergammas are designed to be exposed a little darker. Why? Simple, to keep skin tones away from the compressed part of the curve.

Here are the numbers for the 4 primary Sony Hypergammas:

HG1 3250G36, HG2 4600G30, HG3 3259G40, HG4 4609G33.

Cinegamma 1 is the same as Hypergamma 4 and Cinegamma 2 is the same as Hypergamma 2.

All of the Hypergammas and Cinegammas are designed to exposed a little lower that with a standard gamma.

Exposure levels using EI ISO and zebras with the PMW-F5 and raw.

The PMW-F5 and F55 are fantastic cameras. If you have the AXS-R5 raw recorder the dynamic range is amazing. In addition because there is no gamma applied to the raw material you can be very free with where you set middle grey. Really the key to getting good raw is simply not to over expose the highlights. Provided nothing is clipped, it should grade well. One issue though is that there is no way to show 14 stops of dynamic range in a pleasing way with current display or viewfinder technologies and at the moment the only exposure tool you have built in to the F5/F55 cameras are zebras.

My experience over many shoots with the camera is that if you set zebras to 100% and don’t use a LUT (so your monitoring using S-Log2) and expose so that your just starting to see zebra 2 (100%) on your highlights, you will in most cases have 2 stops or more of overexposure headroom in the raw material. Thats fine and quite useable, but shoot like this and the viewfinder images will look very flat and in most cases over exposed. The problem is that S-Log 2’s designed white point is only 59% and middle grey is 32%. If your exposing so your highlights are at 100%, then white is likely to be much higher than than the designed level, which also means middle grey and your entire mid range will be excessively high. This then pushes those mids into the more compressed part of the curve, squashing them all together and making the scene look extremely flat. This also has an impact on the ability to focus correctly as best focus is less obvious with a low contrast image. As a result of the over exposed look it’s often tempting to stop down a little, but this is then wasting a lot of available raw data.

So, what can you do? Well you can add a LUT. The F5 and F55 have 3 LUTS available. The LUTS are based either on REC709 (P1) or Hypergamma (P2 and P3). These will add more contrast to the VF image, but they show considerably less dynamic range than S-Log2. My experience with using these LUT’s is that on every shoot I have done so far, most of my raw material has typically had at least 3 stops of un-used headroom. Now I could simply overexpose a little to make better use of that headroom, but I hate looking into the viewfinder and seeing an overexposed image.

Why is it so important to use that extra range? It’s important because if you record at a higher level the signal to noise ratio is better and after grading you will have less noise in the finished production.

Firmware release 1.13 added a new feature to the F5 and F55, EI Gain.  EI or Exposure Index gain allows you to change the ISO of the LUT output. It has NO effect on the raw recordings, it ONLY affects the Look Up Tables. So if you have the LUT’s turned on, you can now reduce the gain on the Viewfinder, HDSDI outputs as well as the SxS recordings (see this post for more on the EI gain). By using EI gain and an ISO lower than the cameras native ISO I can reduce the brightness of the view in the viewfinder. In addition the zebras measure the signal AFTER the application of the LUT or EI gain. So if you expose using a LUT and zebra 2 just showing on your highlights and then turn on the EI gain and set it to 800 on an F5 (native 2000ISO) or 640 on an F55 (native 1250ISO) and adjust your exposure so that zebra 2 is once agin just showing you will be opening your aperture by 1.5 (F5) or 1 (F55) stop. As a result the raw recordings will be 1.5/1 stop brighter.

In order to establish for my own benefit which was the best EI gain setting to use I spent a morning trying different settings. What I wanted to find was a reliable way to expose at a good high level to minimise noise but still have a little headroom in reserve. I wanted to use a LUT so that I have a nice high contrast image to help with focus. I chose to concentrate on the P3 LUT as this uses hypergamma with a grey point at 40% so the mid range should not look underexposed and contrast would be quite normal looking.

When using EI ISO 800 and exposing the clouds in the scene so that zebras were just showing on the very brightest parts of the clouds the image below is what the scene looked like when viewed both in the viewfinder and when opened up in Resolve. Also below is the same frame from the raw footage both before and after grading. You can click on any of the images to see a larger view.

P3 LUT, XDCAM recording, 800 EI ISO (PMW-F5).
Raw footage, EI 800 ISO pre-grade.
Raw, 800 ISO after grade. NO clipped highlights.

As you can see using LUT P3 and 800 EI ISO (PMW-F5) and zebra 2 just showing on the brightest parts of the clouds my raw footage is recorded at a level roughly 1.5 stops brighter than it would have been if I had not used EI gain. But even at this level there is no clipping anywhere in the scene, so I still have some extra head room. So what happens if I expose one more stop brighter?

The XDCAM recording, LUT P3, 800 EI, +1 stop, zebras showing over almost all clouds.
Raw clip at +1 stop prior to grade.
Raw at +1 stop after grade, no sign of any clipping.

So, as you can see above even with zebras over all of the brighter clouds and the exposure at +1 stop over where the zebras were just appearing on the brightest parts of the clouds  there was no clipping. So I still have some headroom left, so I went 1 stop brighter again. The image in the viewfinder is now seriously over exposed.

The XDCAM recording at +2 stops, the sky and clouds look very overexposed.
Raw clip, pre grading (LUT P3, EI 800). Looking scarily over exposed.
After the grade the raw is looking much better, but there is a bit of clipping on the very brightest clouds.

The lower of the 3 images above is very telling. Now there is some clipping, you can see it on the waveform. It’s only on the very brightest clouds, but I have no reached the limit of my exposure headroom.

Based on these tests I feel very comfortable exposing my F5 in raw by using LUT P3 with EI gain at 800 and having zebra 2 starting to appear on my highlights. That would result in about 1.5 stops of headroom. If you are shooting a flat scene you could even go to 640 ISO which would give you one safe stop over the first appearance of zebra 2. On the F55 this would equate to using EI 640 with LUT P3 and having a little over 1.5 stops of headroom over the onset of zebras or EI 400 giving about 1 stop of headroom.

My recommendation having carried out these tests would be to make use of the lower EI gain settings to brighten your recorded image. This will result in cleaner, lower noise footage and also allow you to “see” a little deeper into the shadows in the grade. How low you go will depend on how much headroom you want, but even if you use 640 on the F5 or 400 on the F55 you should still have enough headroom above the onset of zebra 2 to stay out of clipping.


Tips for shooting in very cold weather.

(Updated 12/2023)

With winter well upon us I thought it would be good to share some of my arctic shooting experience. I’ve shot in temperatures down to -45c in the arctic in winter.

Overall modern tapeless cameras do OK in extreme cold. The most reliable cameras are generally larger solid state cameras. Larger cameras cool slower than small ones and larger cameras will hold on to heat generated internally better than small ones. Cameras and electronics with lots of cooling vents can sometimes also be troublesome as the vents allow them to cool more quickly. But cold is not necessarily going to be the biggest problem.

IMPORTANT NOTE: It is EXTREMELY dangerous to charge normal  lithium batteries that are below freezing. Below freezing the lithium in the battery migrates to the anode of the battery cell. This cuase permanent damage to the battery shortening its life and if enough builds up around the anode it can short the battery out causing a sudden fire/explosion. Each time you charge a very cold lithium battery more lithium builds up. It is possible for a lithium battery that has been charged when very cold to suddenly burst into flames some weeks/months/years later if bumped or knocked causing the lithium build around the anode to shift. Always warm up any lithium batteries before attempting to charge them.

Filming in a remote arctic area. Photo by Jan Helmer Olsen.

Condensation:

Condensation is the big deal breaker. When you take the very cold camera inside into a warm house/hotel/car/tent you will get condensation. If the camera is very cold this can then freeze on the body of camera including the glass of the lens. If there is condensation on the outside of the camera, there will almost certainly also be condensation inside the camera and this can kill your camera.

To prevent or at least reduce the condensation you can place the camera in a large ziplock or other sealed bag BEFORE taking it inside, take the camera inside in the bag. Then allow the camera to warm up to the ambient temperature before removing it from the bag. Peli cases are another option, but the large volume of the pelicase means there will be more moisture inside the case to condense and the insulating properties of the case mean that it could take many, many hours to warm up.

I don’t recommend storing a cold or damp camera in a Pelicase (or any other similar waterproof case) as there is nowhere for the moisture to go, so the camera will remain damp until the case is opened and everything dried out properly.

Rather than moving a camera repeatedly from outside to inside and repeatedly generating risky condensation you should consider leaving the camera outside. You can leave the camera outside provided it does not get below -30c. Below -30c you risk the LCD panel freezing and cracking. LCD  panels freeze at between -30 to -40c. If you are using a camera in very cold conditions and you notice the edges of the LCD screen going blue or dark you should start thinking about warming up that LCD panel as it may be close to freezing.

LCD displays will become slow and sluggish to respond in the cold. Your pictures may look blurry and smeary because of this. It doesn’t affect the recording, only what you see on the LCD.

Very often in cold regions houses will have an unheated reception room or porch. This is a good place to store your camera rather than taking it inside into the warm. Repeatedly taking a camera from cold to warm without taking precautions against condensation will shorten the life of your camera.
If you can, leave the camera on between shots. The camera generates some heat internally and this will prevent many issues.

BATTERY LIFE:

Li-Ion batteries are effected by the cold but they are not nearly as bad as Nicads or NiMh batteries which are all but useless below freezing. li-Ion battery life gets reduced by between 25 and 50% depending on how cold it is and the quality of the battery (very cheap cells may have a higher water content which can freeze causing the cell to dramatically lose capacity and the ability to deliver power).
Down to about -10c there is only a very marginal loss of capacity. Down to -25c you will lose about 20%-30% below -25c the capacity will fall away further and it becomes impossible to use the full capacity of the battery.

Keep your spare batteries in a pocket inside your coat or jacket until you need them. After use let the battery warm up before you charge it if you can. Charging a very cold battery will reduce the lifespan of the battery and it won’t fully charge (see note above – DO NOT CHARGE a battery that is below freezing, it is very dangerous). One top tip for shooting outside for extended periods is to get a cool box. Get some chemical hand warmers or better still electric rechargeable handwarmers and place them in the cool box with your batteries to keep them warm. If you don’t have hand warmers you can also use a hot water bottle. Chemical hand warms typically use an iron powder mixed with salts. The heat comes from the iron rapidly rusting. This process needs moisture to work. A chemical handwarmer will work great in a pocket close to your body moisture but when it is very cold there isn’t enough moisture in the air for a chemical warmer to work when it is away from your body moisture. As a result chemical warmers inside camera covers or in a cool box might not actually produce any heat.

Watch your breath

If your lens has and snow or ice on it, don’t be tempted to breath or blow on the lens to blow the ice off.  Do not to breath on the lens when cleaning it as your warm breath will condense on the cold glass and freeze.  Also try to avoid breathing out close to the viewfinder.  When it is very cold and if you are warm in your nice thick winter clothes even standing close to the camera can lead to frost and ice building up on it.  Small amounts of sweat from your body will evaporate and this moisture will find its way to the camera, even if you are a few feet (1 or 2m) from it. If doing a timelapse of the Northern Lights, once the camera is running you should move away from the camera.

A small soft paint brush is good for keeping your lens clean as in very cold conditions you’ll simply be able to brush and snow or ice off. Otherwise a large lens cloth.
Your lens will get cold and in some conditions you will get frost on the front element. To help combat this wrap some insulating fabric around the body of the lens. Wrist sweat bands are quite good for this or an old sock with the toes cut off.  For time-lapse long sessions in very cold weather you might want to get a lens heater for the lens. These are normally 12 volt or USB powered and wrap around the lens. They don’t use lots of power but they do warm the lens just enough to keep the worst of the condensation, dew and frost off the lens. They are sometimes also called “dew heaters” and are sold by most good telescope suppliers.

Covers.

Conventional plastic rain covers become brittle below about -15c and can even shatter like glass  below -20c. The clear plastic panels in other covers can also suffer the same fate. So use if you use a cover use one made out of fabric. Special insulated cold weather covers often called “polar bears” can be used and these often have pockets inside for chemical heat packs (although when very cold these don’t work, use a USB hand warmer instead). These are well worth getting if you are going to be doing a lot of arctic shooting with a larger camera and will help keep the camera warm. But for very small cameras the bulk of a thick cover can make it almost impossible to use. As an alternative wrap the camera in a scarf or cut the sleeves of an old sweater to make a tube you can slide over the camera. If you have a sewing machine you could make a simple cover out of some fleece type material.
For DSLR’s and stills cameras a balaclava can be used to cover the camera body to provide some protection. However unheated covers don’t make a big difference when the camera is outside in very cold temperatures for extended periods unless it is always left turned on, eventually the cold will get to it.

Brittle Plastic.

Plastics get brittle at low temperatures so be very gentle with anything plastic, especially things made from very hard, cheap plastic. The plastic Sony use appears to be pretty tough even at low temps. Wires and cables may become as rigid as a steel rod. Be gentle, bend then too much and the insulation may split and the cable break. I try to avoid bending any cable once it has become very cold.

Other considerations are tripods. If outside in very low temps for more than 30mins or so the grease in the tripod will become very thick and may even freeze, so your fluid damping will become either very stiff or freeze up all together. Contact your tripod manufacturer to see what temperatures their greases can be used over. Vinten and some of the other tripod companies can winterise the tripod and replace the normal grease with arctic grease. If you are unsure put your tripod head in your deep freeze at home for a few hours and see if it still works when you take it out.

Looking after yourself.

I find that the best way to operate the camera is by wearing a pair of large top quality mittens (gloves are next to useless below -15c), Consider getting a pair of Army surplus arctic mittens, they are very cheap on ebay and from surplus stores and will normally have an additional “trigger finger”. This extra finger makes it easier to press the record button and things like that.  If you can get Swedish or Finnish military winter mittens, these are amongst the best. I wear a pair of thin “thinsulate” fleece gloves that will fit inside the mittens, i can then slip my hands in and out of the mittens to operate the camera. If you can get gloves with finger tips compatible with touch screens this will allow you to use any touch functions on a camera or your phone. Get extra large mittens, then it is easier to slip your hand in and out.

I keep a chemical hand warmer inside the mittens to warm my fingers back up after using the camera (or use heated mittens powered by a USB battery pack).

The hardest thing to keep warm is your feet. If you’ll be standing in snow or standing on ice then conventional hiking boots etc will not keep your feet warm. A Scandinavian trick if standing outside for long periods is to get some small twigs and tree branches to stand on and help insulate your feet from the cold ground. If your feet get cold then you are at risk of frostbite or frost nip. Invest in or hire some decent snow boots like  Baffin’s.  There is almost nothing worse than having ice cold feet when working. Don’t forget that if you do get cold, moving around, running on the spot etc will help get your circulation going and help you to warm up. Also consider some high energy food and snacks, you will burn a lot more calories in the cold than you would do normally. Also a flask with a hot drink is always welcome.  I have an arctic clothing guide here; Arctic Clothing Guide |

Raw is raw, but not all raw is created equal.

I was looking at some test footage from several raw video cameras the other day and it became very obvious that some of the cameras were better than others and one or two had some real problems with skin tones. You would think that once you bypass all the cameras internal image processing that you should be able to get whatever colorimetry that you want from a raw camera. After all, your dealing with raw camera data. With traditional video cameras a lot of the “look” is created by the cameras color matrix, gamma curves and other internal processing, but a raw camera bypasses all of this outputting the raw sensor data. With an almost infinite amount of adjustment available in post production why is it that not all raw cameras are created equal?

For a start there are differences in sensor sensitivity and noise. This will depend on the size of the sensor, the number of pixels and the effectiveness of the on-sensor noise reduction. Many new sensors employ noise reduction at both analog and digital levels and this can be very effective at producing a cleaner image. So, clearly there are differences in the underlying electronics of different sensors but in addition there is also the quality of the color filters applied over the top of the pixels.

On a single chip camera a color filter array (CFA) is applied to the surface of the sensor. The properties of this filter array are crucial to the performance of the camera. If the filters are not selective enough there will be leakage of red light on to the green sensor pixels, green into blue etc. Designing and manufacturing such a microscopically small filter array is not easy. The filters need to be effective at blocking undesired wavelengths  while still passing enough light so as not to compromise the sensitivity of the sensor. The dyes and materials used must not age or fade and must be resistant to the heat generated by the sensor. One of the reasons why Sony’s new PMW-F55 camera is so much more expensive than the F5 is because the F55’s sensor has a higher quality color filter array that gives a larger color gamut (range) than the F5’s more conventional filter array.

The quality of the color filter array will affect the quality of the final image. If there is too much leakage between the red, green and blue channels there will be a loss of subtle color textures. Faces, skin tones and those mid range image nuances that make a great image great will suffer and no amount of post production processing will make up for the loss of verisimilitude. This is what I believe I was seeing in the comparison raw footage where a couple of the cameras just didn’t have good looking skin tones. So, just because a camera can output raw data from it’s sensor, this is not a guarantee of a superior image. It might well be raw, but because of sensor differences not all raw cameras are created equal.